Saturday, July 29, 2017

Anything Goes with Koi

The Simon Says Stamps Wednesday Challenge for this week is Anything Goes.  Sometimes that stresses me out…you know, way too many options.  This time, I did ok with it.  I just jumped in and played around until I came up with this card:
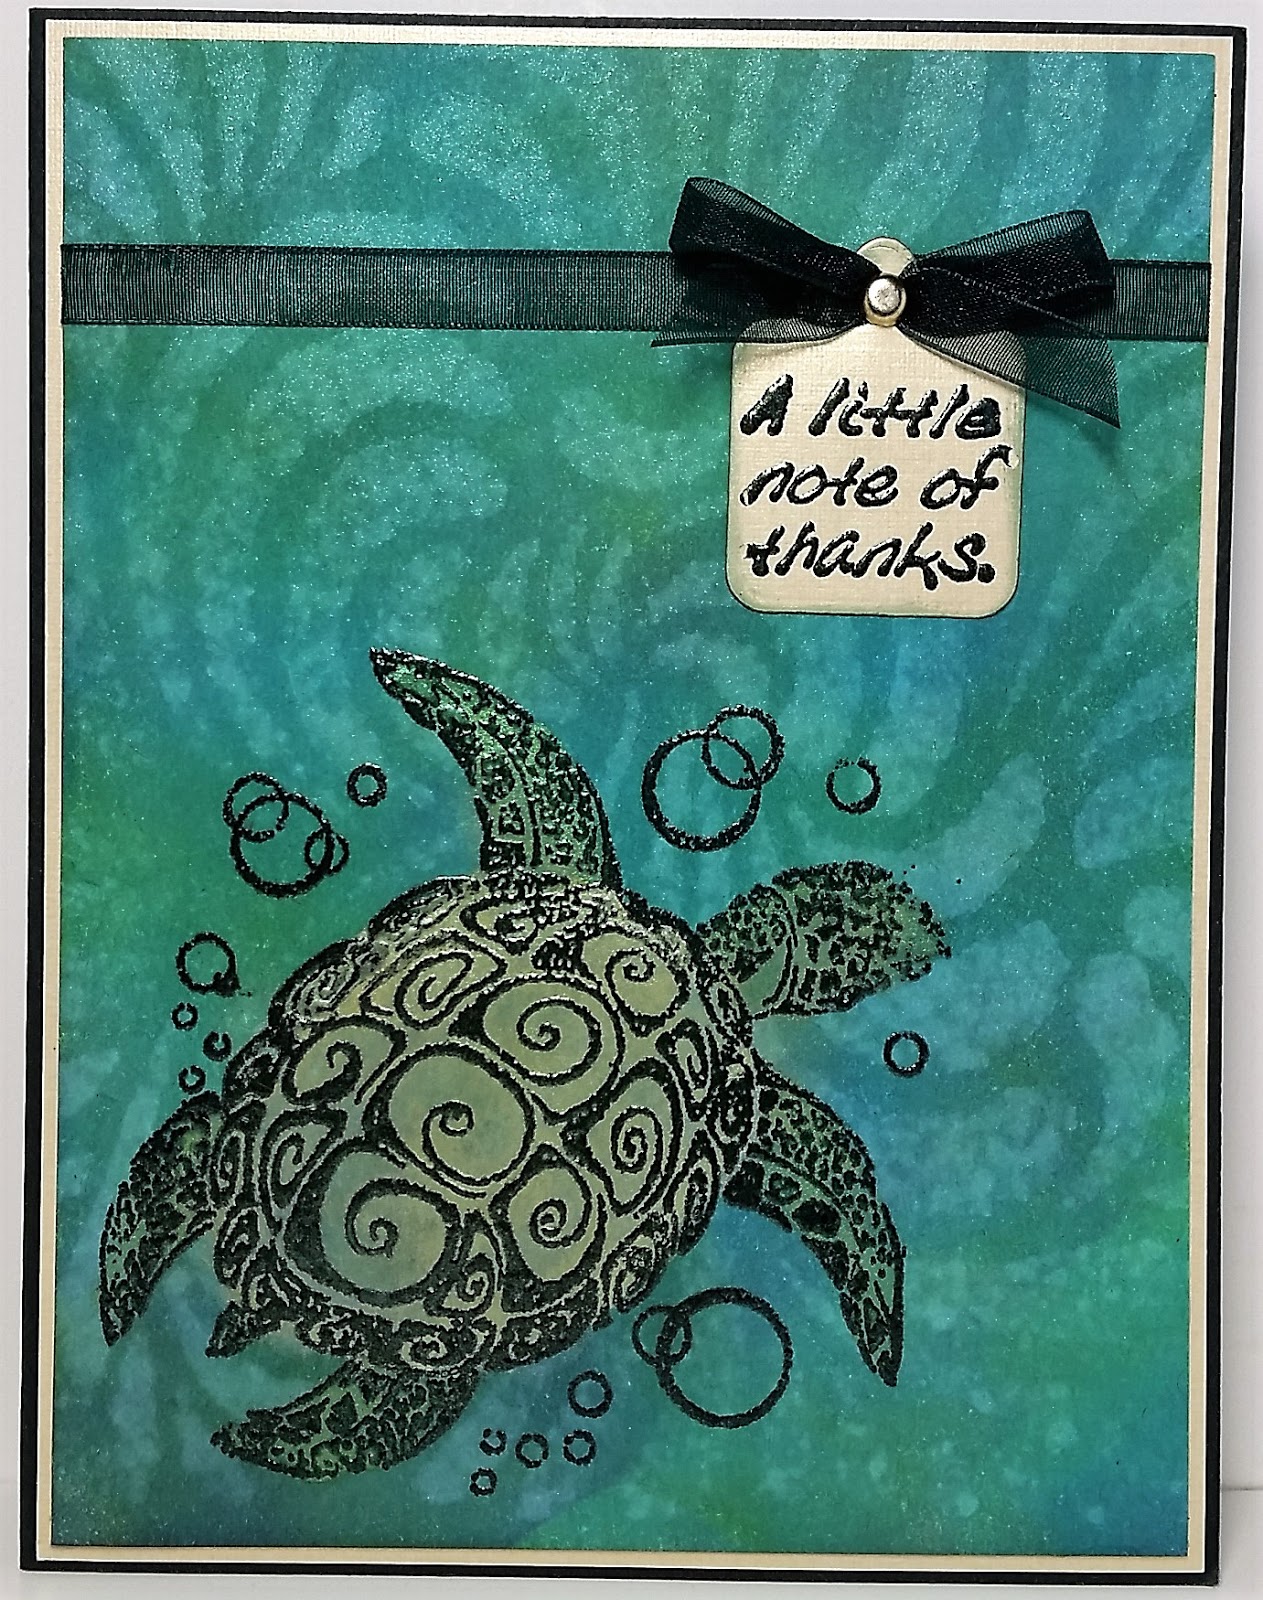
I created the background with Sea Glass, Electric Blue and Dragonfly GlimmerMists and Ranger Watercolor paper.  When spraying each color, I tried to keep them each to 1/3 of the panel, or at least as much as I could control those little flying drops of color!  In the end they blended better than I expected.  Once it was dry, I used a background stamp from Technique Junkies and Library Green Archival Ink to add the swirls.   As a final step, I dry embossed it using an old Cuttlebug folder.

Other supplies I used are:

**Paper from Gina K. Designs and Club Scrap.

**The sentiment stamp is from Gina K. Designs, inked with Versa Mark, embossed with Lindy’s Stamp Gang Midnight Emerald powder and cut out using a Spellbinder Deckled Rectangles die.

**The Koi fish die is from Elizabeth Craft Designs.

**The ribbon is from Club Scrap’s “Garden Shed” kit.

Thanks for stopping by!

Friday, July 28, 2017

Video Inspiration

Stamp TV has over a library of over 950 videos filled with different techniques and all kinds of inspiration.  I have long been a fan and have learned many new techniques from watching these gems.  This week’s Stamp TV challenge at Gina K. Designs is to make a card inspired by one of the videos.  My personal challenge was to find one that I haven’t “used” before.  My card ended up being inspired by not one but two of the videos.  I used the “Highlighting and Edging with Emboss Resist” technique and also “Creating a Metallic Embellishment” to create a Christmas card:
I was also inspired by Simon Says Stamp’s Monday challenge “You’ve Got the Edge”.  The background panel was first inked through a Simon Says Stamp stencil with Gina K. Designs Cherry Red Ink, then cut out with an old die from Spellbinders.  I traced the edge with VersaMarker Pen, then embossed it using Zing Metallic Gold embossing powder.

The focal image is from Gina K. Designs, stamped with VersaMark ink and embossed using Stampendous Ivory powder.  I used three sizes of We R Memory Keepers Nesting Ovals dies, coating the largest with VersaMark ink and Zing Metallic Gold embossing powder.   I embossed a Spellbinder Fancy Framed Tags Two die embossed with the Zing Gold powder, cut it in half and added it behind the largest oval for a little extra flair.

Other supplies I used are:

**Paper from Gina K. Designs and Club Scrap

**The sentiment stamp is a die from Die-Versions that was coated in Versa Mark ink and embossed with Zing Metallic Gold powder.

**The ribbon is from Club Scrap’s “Sunflowers” kit.

Thanks for stopping by!

Thursday, July 13, 2017

Creating a Vintage Look

I spent a good part of today just playing in my craft space and it was a much needed boost for my crafting mojo.  I started with my Color Bursts and some stencils, a technique that was new to me.  I wasn’t totally satisfied with the results, but I really liked the color combination on one panel.  After messing with it a bit I came up with this anniversary card:
The background panel consists of Burnt Orange and Sepia Color Bursts, with some Suede Glimmer Mist sprayed on top.  Ok, I liked where this was going.  I used a Tim Holtz background stamp and some Ranger Tarnished Gold embossing powder.  Oops…it seemed to take a wrong turn.  Not willing to give up yet, I stamped it again (easy to do thanks to my MISTI) and tried some Midnight Copper embossing powder from Lindy's Stamp Gang right over the other.  Cool! It reached a destination that I was happy with.  Persistence really can pay off!

The rose is a two part “watercolor” stamp from Rubbernecker Stamps.  I used Gina K. Designs Sweet Mango and Wild Dandelion ink for the solid part, and Gina K.’s Dark Chocolate and StazOn Olive Green for the outline.  The leaves and stem were colored in with a little Pine Needles Distress Marker mixed with water.

All along I was trying to make a “vintage” looking card for the current challenge on the Rubbernecker Stamps blog.  I don’t have any pattern paper, and I don’t have any stamps that look vintage, so I had to get creative.  I love the way the card turned out, but I wasn’t sure if it was very “vintage-y”. While searching for something in my stash, I came across an old tag that was printed with a cool lacy type image.  I added some Pewter Perfect Pearls Mist to it which made it look a little like some shimmery parchment paper.  Since “vintage” goes together with “nostalgia” which ties directly into “Christmas”, I turned it into a Christmas card:
The candles are another two part “watercolor” stamp from Rubbernecker Stamps.  I colored the solid stamp with Spiced Marmalade, Candied Apple and Pine Needles Distress Markers, and stamped the outline with Tuxedo Black Memento Ink

Other supplies I used are:

**Paper from Gina K. Designs and Club Scrap.

**The anniversary card sentiment stamp is from I Break For Stamps, stamped with Distress Embossing Ink and embossed with the Midnight Copper EP from Lindy’s Stamp Gang.  It was cut out using a Spellbinders Petite Labels One die.

**I created the “Joy” sentiment on the Christmas card by using an old alphabet stencil (not even sure which company to credit).  Keeping with the “vintage” theme I went old school and used a Candied Apple Distress Marker to trace and color in the letters.  The tag was cut out using a Spellbinders Fancy Framed Tags Two die.

**The heart on the anniversary card was cut out using a Taylored Expressions Pocket & Pages die, then embossed with the Midnight Copper EP from Lindy’s.

**I used some Tea Dye Distress ink on the edge of the rose, and some Candied Apple Distress ink on the edge of the Christmas card.

**The ribbon is from Club Scrap (brown from the Aurora Borealis kit, red from the Boardwalk kit).

**Gems and nail heads are from my stash.

Thanks for stopping by! (Sorry for the long post.)

Saturday, July 1, 2017

Thanks…”Turtally”!

Living in Hawaii definitely has its perks.  One of my favorites is the ability to walk along a rocky shore near my house and watch the Honu (turtles) playing in the waves.  After one of those relaxing walks this week, I was inspired to make this card:
It was love at first sight when I saw this turtle stamp from Technique Junkies.  I have seen (and own a few) really cool turtle stamps so I don’t know what it was about this one that had me adding it to my shopping cart before I could say “I’ll take it”.

This week’s Monday Challenge at Simon Says Stamps told me to “stencil it” so that is what I did for the background.  I started by sponging four colors of Distress ink (Cracked Pistachio, Mowed Lawn, Salty Ocean and Chipped Sapphire) onto a white piece of card stock. I placed a swirl stencil from Hero Arts over the inked piece and lightly spritzed it with Electric Blue Glimmer Mist. After a quick blot with some scrap paper and letting it rest for a minute to soak in, I lifted the stencil and had a slightly shimmery, swirly, watery looking background.

My Honu friend was stamped with Distress Embossing ink and embossed with Midnight Emerald powder from Lindy’s Stamp Gang. I mixed some Perfect Pearl, Perfect Gold and Forever Green Perfect Pearls with a little bit of water and painted on to make him shine a little more.

Other supplies I used are:

**Paper from Club Scrap

**The sentiment stamp is an old one from Stampin’ Up, stamped with Distress Embossing ink and embossed with the Midnight Emerald EP from Lindy’s Stamp Gang.

**The tag was cut using a die from Die-Versions (but it doesn't seem to be available anymore).

**I used a little Library Green Archival ink to distress the edges of the tag.

**The ribbon is from Club Scrap (All That Jazz kit) and the brad is from my stash.

Thanks for stopping by!