Wednesday, July 27, 2016

Office Space Fun

It is that time of the month again…time for the Club Scrap Office Space Blog Hop! I had some fun, and went a little crazy this month:
I had planned to make the “office” related projects, then found out my son will be moving into a new place soon, and added a house warming gift for him. I’ll show you each piece and share a few details.

Project #1
I followed Tricia’s tutorial for a Business Card Holder.  All the supplies came in my Office Space Lite kit except the ribbon (which came from my stash, altered with Evergreen Bough Distress Marker), the die for the button closure (Die-namics), and the brad (from my stash). I also used Evergreen Bough Distress Ink on some of the edges, and a coat of Glue N’ Seal from Ranger to protect it all.

Project #2
I followed a Technique Junkies tutorial to make this Corner Bookmark . All the supplies came in my Office Space Lite kit except the ribbon (which was upcycled), the dies for the decoration (Spellbinders Circle and Spellbinders Floral Burst ), a border punch from Tonic Studios, some Tomato Soup Gina K Designs Ink, a drop of Rose Gold Liquid Pearls in the center of the design, and a coat of Glue N’ Seal .

Project #3
This project was inspired by a tutorial on the Splitcoast Stampers website. It started with a simple acrylic picture frame and a pad of post-it notes. All the other supplies came from my Office Space Lite kit except some Tomato Soup Gina K Designs Ink and some Earth Club Scrap Ink for edging, a button die from Die-namics , and some Glossy Accents on the coffee mug.

Project #4
This is the gift for my son. It started with an unfinished wood sign from my local Ben Franklin store. I stained it using Vintage Photo Distress Stain.  All the paper came from my Office Space Lite kit . The background pieces were embossed with a Tim Holtz Alterations (Sizzix) embossing folder, and inked with Ocean and Earth Club Scrap Ink . The tiki pieces were cut using a Die-Versions die and the color was altered with Champagne Glimmer Glaze (tiki faces), Earth Club Scrap Ink (behind the faces), Siren Smooch Ink (flowers), Safforn Glimmer Glaze (flower centers) and the Jade STA Metallic Pen that came in my kit (leaves). The “aloha” letters are a digital font from the Club Scrap Tahiti Digital kit that I printed out then fussy cut. The twine (from the kit) was altered with the Vintage Photo Distress Ink.  I finished with a layer of Glue N’ Seal over it all.

Thanks for stopping by!

Monday, July 25, 2016

The Waves of Change

It’s week 8 of the Summer of Creative Chemistry. This week’s challenge is to use both Distress Inks and Embossing Powder to create a project. My card was inspired by the honu (turtles) that I watch playing in the waves on my beach walks:
Here are the supplies I used and a few details:

**paper is from Gina K Designs (base) and Club Scrap.

**the background is the Brayered Stains Technique using Evergreen Bough, Broken China, Faded Jeans and Shabby Shutters Distress Stains.  I then stamped a “water” stamp from Seaside Stamping Ink using Faded Jeans Distress Ink.  Next I used a sponge ink tool to randomly swipe on some Distress Embossing Ink, sprinkled on some Ranger Sticky Embossing Powder and followed up with some Clear Rock Candy Distress Glitter after heating the powder.

**the turtle is a stamp from Club Scrap (Castaway), stamped with Distress Embossing Ink, embossed with Sticky embossing powder, then covered with copper leaf from Art Minds (which I found at Michaels) and fussy cut.

**the sentiment is also a stamp from Club Scrap (Transformations), stamped with Distress Embossing Ink, and embossed with Hyacinth Blue Jade powder from Lindy’s Stamp Gang. The sentiment card is also edged with embossing ink, sticky powder and covered with the copper leaf.

**both the background and the sentiment card were cut out using Deckled Retangles dies from Spellbinders.

**The ribbon is from Club Scrap (Boardwalk), altered with a Y11 Copic Marker.

**the brads are from my stash.

Thanks for stopping by!

Sunday, July 17, 2016

A Challenge with Alcohol…Inks

Who knew chemistry could be so much fun? Especially in the middle of summer? Of course, if my high school chemistry teacher taught me the "crafty kind" of chemistry, like Tim Holtz, and made it as much fun, I might not have slept through a lot of his class. 
The challenge for week 7 of Summer of Creative Chemistry is to do a project using alcohol ink. I am glad that I chose the Monoprint technique because I haven’t done it in a while and had forgotten how much fun it is. I made a card for my sister and brother-in-law’s 25th wedding anniversary:
Here are the supplies that I used:
**paper from Gina K Designs (base), Club Scrap, and Ranger Gloss Paper.

**Currant, Meadow, Denim and Silver Mixative Alcohol Inks.

**Jet Black Archival Ink.

**large tree stamp is from Club Scrap (Great Outdoors), smaller tree stamps are from I Break For Stamps (trees in valley, tree line). “Cheers” stamp is from Gina K Designs.

**Silver Club Scrap Ink, an old Creative Memories Precious Element gel pen, a Spellbinders die, and an old stencil from The Crafters Workshop were used for the sentiment tag (oh, plus a little of my own handwriting).

** A Fiskars Corner Edger (Blossom), which doesn’t seem to exist anymore, and ribbon from Club Scrap (Full Circle) were used to add extra interest.

Thanks for stopping by!

Sunday, July 10, 2016

“A Simple Hello” to Stencils

I LOVE stencils! There are so many cool things that you can do with them. I admit that I don’t push the limits a much as I could or should, but I am working on getting better. It was fun to have two challenges using stencils that I could combine into one project. The Summer of Creative Chemistry week 6 challenge is to use two stencil techniques (from Creative Chemistry 102, day two) together on one project. The 
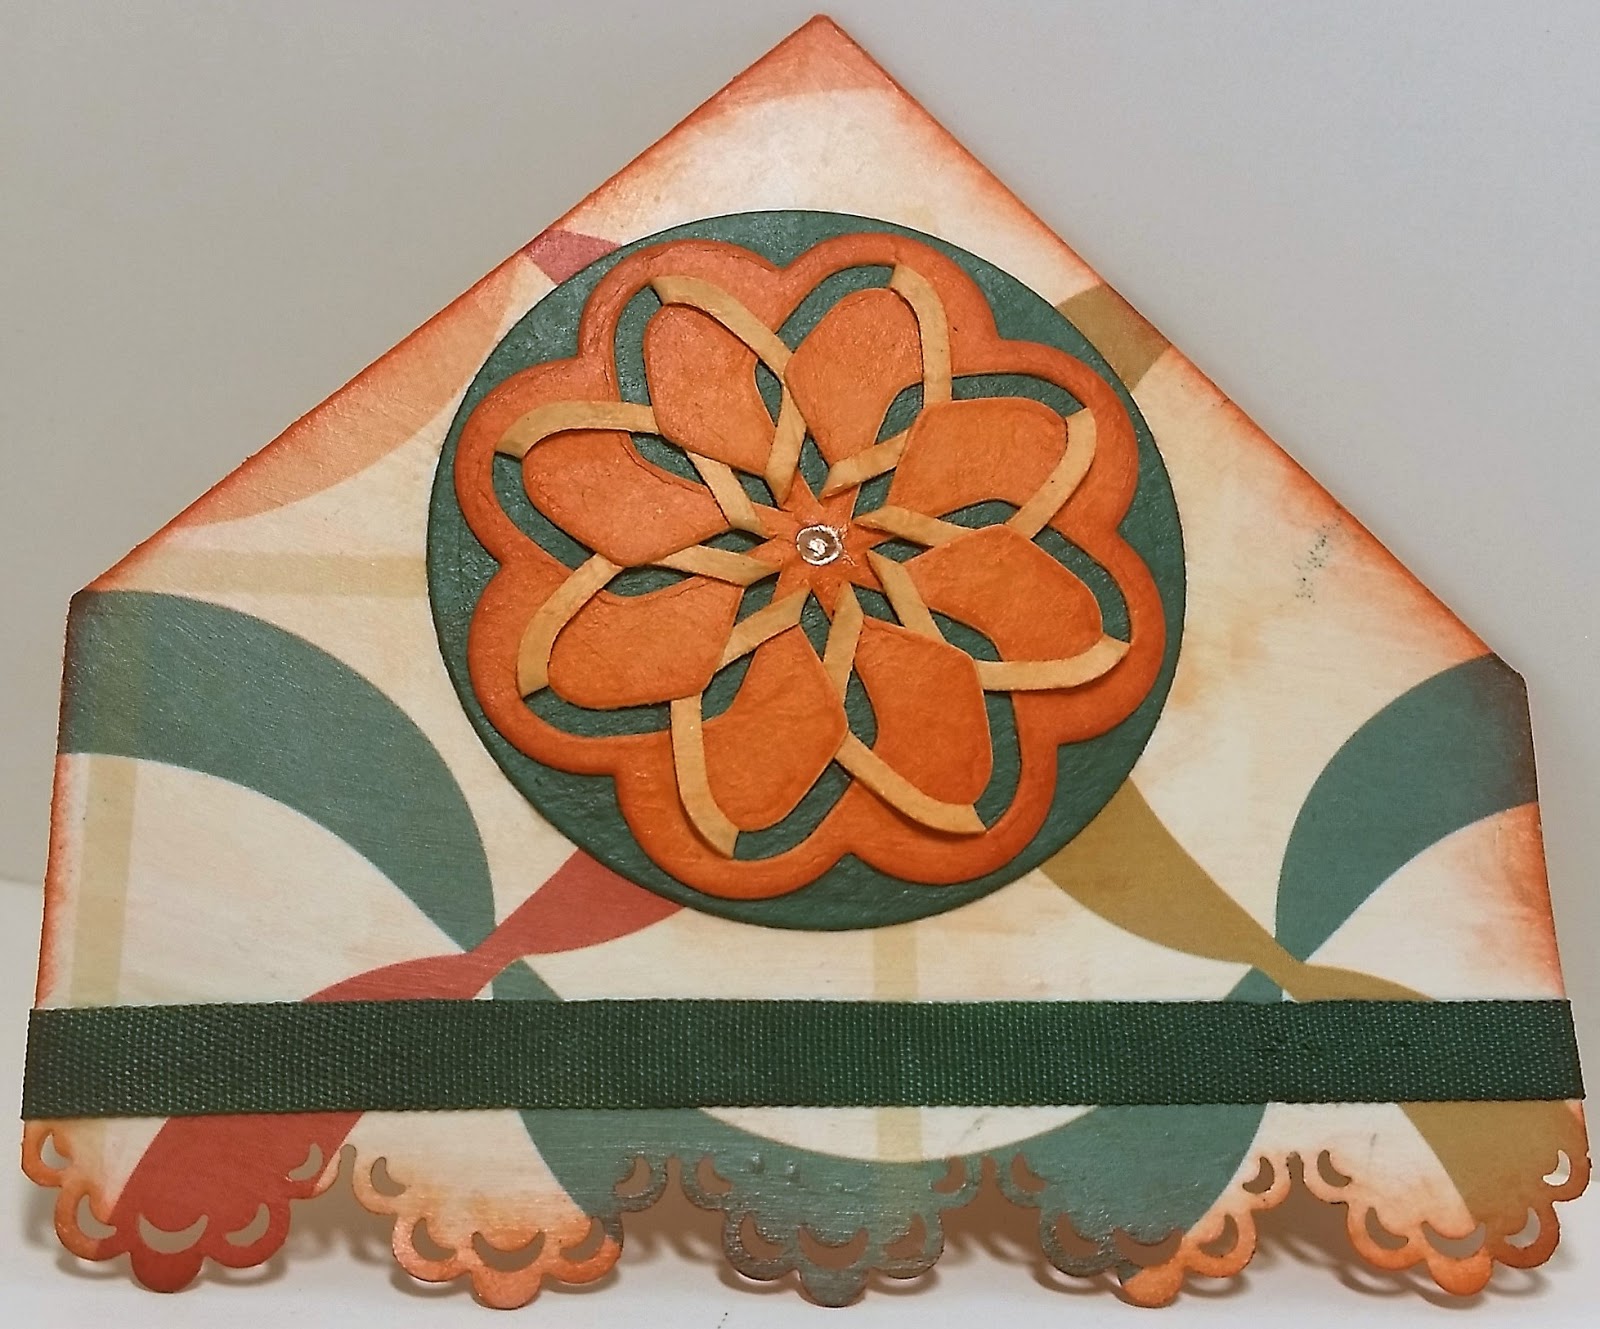
Club Scrap July Technique Challenge is to “stamp through your stencil”. Here is my card:
I started with a stencil that was an extra for Club Scrap’s “Moroccan Spice” collection. I sponged on Topaz Club Scrap ink, then sprayed it with Yellow Daisy Glimmer Mist (which doesn’t seem to be available anymore). After tacking down ClubScrap’s “Dahlia” stencil, I sponged on Tangerine Club Scrap ink. The stamping part was done using a Club Scrap stamp from “Gratitude” and Carnation Club Scrap ink, meeting the the Club Scrap challenge, and the first technique for the Creative Chemistry challenge. Here is a close up of the flower to better show the image inside the stencil:
Next, while the stencil was still tacked down, I did the “Stencil Sketching” technique using a Abandoned Coral Distress Marker…technique number two. Then, just for grins, I went for a third technique and tried the “Embossing with Stencils”. My stencil didn’t quite stay in place, but it still added a little bit extra texture. I finished with one for spray of the Glimmer Mist to make the whole panel shimmer.

Other supplies I used:

**paper is from Club Scrap, and the sparkly mat is from my stash.

**sentiment stamp is from Club Scrap's “National Parks” kit, stamped with VersaMark ink and embossed with Midnight Emerald EP from LindysStamp Gang.

**ribbon is from Club Scrap’s “All That Jazz” kit.

**bling in the middle of the flower is from my stash.

Thanks for stopping by!

Sunday, July 3, 2016

Playing With Paint…

...Distress paint to be exact. I admit, that with all the crafty mediums out there, paint is not one of my go to choices. I only have seven colors of Distress Paint, so this week’s Summer of Creative Chemistry Week 5 challenge to use three or more colors of Distress Paint was extra interesting for me. However, I had a blast planning and playing with what I have. I ended up making a birthday card for my son:
I did the Distress Paint Marbling Technique for the background, using Black Soot, Brushed Pewter and Tarnished Brass Distress Paint.  I added a Pinking Circle die (from Taylored Expressions) cut out of a piece of silver velum, then dry embossed the whole thing using a Sizzix “Cracked” embossing folder.

The gecko is a die from Die-Versions.  He is cut out of Grungepaper, glued onto more Grungepaper and fussy cut out. I added a layer of Clear Rock Candy Distress Crackle Paint, then some Peeled Paint and Tarnish Brass Distress Paint.  Once it was all dry, I used a little Antique Bronze Distress Stain and some Black Soot Distress Ink to try to bring out the crackles and other details.

The green piece that has the sentiment on it was created from a scrap piece of black cardstock and the paints left over on my craft sheet after doing the background and gecko.  I just kept adding water, mixing it up, swishing the paper trough and drying it with my heat too.  The color slowly built up giving it a pretty cool looking texture when you see it up close.

Other supplies I used:

**paper is Gina K Designs (base) and Club Scrap.

**sentiment stamp is from Club Scrap “All That Jazz” kit, stamped with VersaMark ink and embossed with Silver Zing embossing powder.

**ribbon is upcycled, but altered with Brushed Pewter Distress Stain

**nail heads are from Mark Richards

**the layout for the card is loosely based on this last week’s Mojo Monday card sketch.

Thanks for stopping by!